Wednesday, 16 March 2016

Hey all,

I will no longer be posting on this blog, I have moved to


Kay
x

Thursday, 18 February 2016

Catch up...


Well this week I did all my paperwork while the kids are on half term driving me barmy!  There was no point trying to make with anything with those lively twosome about!  Yesterday morning was spent trying to recall how to use excel after not using it for over a year!  It was all done in a few hours so a previous office job was good for future challenges!

My last fair I finally had a great looking stand, not just cards in big plastic really useful boxes and it made a huge difference.  People were more into looking through the cards so the stand was a wise investment.


I had a basket of valentines cards, the card stand and some framed pictures I decided to make a few days before the sale! They are going to try an evening fair as well and see how trade is for that before they decide if it will be a regular one.  I'm also waiting to hear back on a sale held in a village hall every month and waiting to confirm dates on a couple more fairs so it's all looking good!

I have started to apply for design team calls for all the companies I love so will let you all know on that one!

And finally the magazine I sent a card into, I made it in print! It meant so much they liked my work, it means I made the right decision to go it alone and make by hobby into my career. Lucky me!  It was Quickcards Made Easy Issue 149.


The original card looked like this, so although I posted in a pizza style box it did get a little squashed in the post!


Now working on Mother's Day and Easter cards so will pop those up next!
Happy Crafting!
Kay
x

Monday, 18 January 2016

Valentine's...

Well this week I will become a sole trader and I am making a start on my website! I love being around for my kids as have not been working for the past year but I need something for me but didn't want to be an employee again! I have a shop local to me who are going to stock my valentines cards and I will be making more canvas' and pictures as well as one off cards for sale once the website is up and running which is exciting. 

I have made these with the Craftwork Cards "just a cuppa" range. 

Then I went on to use a Dreamees Paris stamp, a a few sheets of Craftwork Cards Paris paper and a Tim Holtz Paris embossing folder together to create these. The gold is the Pebeo guilding wax which I love!

Then I went to Hobbycraft to look for a happy Valentine's Day stamp but they had nothing! Well I did find some of the new Crafters Companion Valentine range so I got an embossing folder and a 6x6 paper pad and today I made these. I've also used some red, white, pink and black card stock from my stash and some wooden hearts that I normally use on wedding cards. The hearts are cut using spellbinders dies and ribbon is from The Works or Hobbycraft. 


Will post more valentines cards once I've made them!
Happy crafting!
Kay 
X

Tuesday, 12 January 2016

Christmas break...


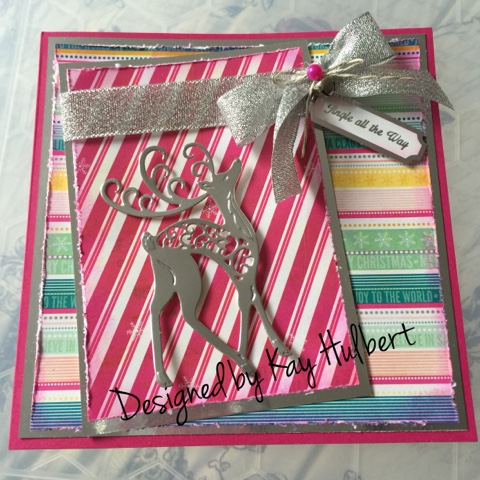
I actually took a few weeks off! Today I was asked to design a card so thought I had better start sorting out my desk!  It's piled high with really useful boxes on one side and everything else the other side lol. The other side pile is a work in progress! Thought I would share a few of my Christmas card makes that I sent to my friends and family. I chose something completely different to all the cards I had been batch making using a bright bo bunny pad purchased from crafts u love and a paper mania bright card pack from hobbycraft. The reindeer and sleigh dies are spellbinders dies.


I roughed all the edges with a WRMK heart sander with a blade and edged with matching ink pads. My new picked raspberry arrived from the states finally today, only fellow crafters will understand the happiness when it finally turned up after ordering from the states on Christmas Eve!

This is the 1st time I have produced my blog from my mobile so now I can blog on the go I may just be able to keep up with my makes!

Next time a very special birthday card.

Happy crafting!
Kay 
X

Friday, 11 December 2015

Man Made...


Finally after being out for delivery since Monday my new kit arrived.  While my son is ill I am quietly making up some cards for a school fair tomorrow!

Craftwork Cards make some great kits and I currently have 2 boxes full of them as I seem to purchase them faster than I can make them! 


I cut down the brick paper to cover half the card, and tore down one edge of the newspaper paper.  I then edged all the papers and card with Tim Holtz distress ink Vintage Photo. I used one of the brick cards that came with the kit and used some basic shape dies to cut some rectangles from the scraps of paper left and mounted the topper that also comes in the kit. I edged the newspaper card candi with the same ink pad and the ribbon and buttons were from Hobbycraft.

I have a project to do for a magazine which is exciting, but it is not out till Feb 16 so will not be able to show it then!

Happy Friday

Kay
x

Monday, 30 November 2015

Cupcake's..

I have used this digi stamp called 'Emily Party' before on cards but I just love it!  It's a Polkadoodles image by Nikky Hall and can be obtained here...


Again I just take the images on the school run and colour while I wait to keep away the boredom! All coloured with Spectrum Noir colour pencils.

The flowers are all by Craftwork Cards, the stamens by Anna Marie Designs and the backing paper I purchased years ago from QVC.  The ribbon and gems are from Hobbycraft and the plain papers are the topsy turvy pack from Create and Craft.

All the flower's on this card are Tattered Flower's big die, the swirl die was free with a magazine years ago and the oval dies are Spellbinders Opulent Oval's.  The happy birthday die is by Crafters Companion and the leaves die used was Spring greenery.  Again I used the topsy turvy papers. I had just received my Spectrum Noir sparkle pens when I had blended this one so I added some glitter!


I'm up to 137 cards for my card fairs and in the middle of making christmas trees which I will post up next!
Kay
x

Saturday, 21 November 2015

Christmas...

So it's getting near to christmas and thankfully I started making cards a while ago for my stall.  I have 110 cards to take so far but only about 30 are Christmas so later today I will be making more to add to the pile!

Here are the one's I have made so far with the new Crafters Companion range... 

This is the Poinsettia die which after I had completed realised the larger petals were done the wrong way, I had stuck the points in the middle!  I think it still looks great though so left it as it was. The leaves are all part of the same die set.  The Merry Christmas is also from Crafters Companion as it the backing paper. All edged with a Pine Needles Distress ink.


Christmas die with different papers with some silver ribbon from my stash and topped with the Crafters Companion Snowflake dies. 


I do not usually do brown as it was my old school uniform colour but it went so well with the gold!  Loved the gold and brown together and the border snowflake die is lovely.  


For this one I used Joy christmas paper with trees with a tree die from marie anne I think (I have borrowed it from my mum!) and used the Crafters Companion snowflakes and stamp.  The ribbon is also from my stash from a little habidashary in Epsom.

Tomorrow I will share more of the Crafters Companion cards I have made so far!

Kay
x


Friday, 20 November 2015

Scruffy Kitten...

I purchased these stamps from Crafters Companion with a CD but to be honest the CD has hardly any papers suitable for the boy stamps.  Nothing at all as far as I can see for the pirate! I just used the stripes! There are a couple on there where you can't make out the details so unsure 100%!  If you like the images I would suggest just the stamps unless just making girls cards, then the CD is fine!

The images are cute however so I have been taking these with me on the school run so when I am waiting about I am still doing something creative!  These are the boys ones I have made so far...

These were my son's 6th birthday cards!  Made with love!


Both images are coloured with Spectrum Noir pens then pencils and blended.

The footballer was on fabric and it was my first play with it and it worked out fine!

The remainder are all for my craft stall so more of a batch make or I wouldn't have many to sell!


The dinosour onesie!


All used with the sentiments that came with the stamps and the backing paper changed in colour from the CD to match.  All ribbons from The works or Hobbycraft and the plain papers are all from the topsy turvy set from Create and Craft. All simple, just took a while to colour!

The Gardener!


 The background paper is again from the CD and the fence I cut using my silhouette machine.
All coloured with Spectrum Noir.
I have been making a lot of Christmas cards but when I get sick of them I have pulled these out for a break!  Next post will share some of my Christmas makes!

Kay
x

Thursday, 19 November 2015

Octavia...

I have been preparing for christmas craft fairs, but took a break to make these lovely digi stamps which I hand coloured with Spectrum Noir (SN) pencils into cards.  I also made up some Crafters Companion cards with the Scruffy Kitten range of stamps.  I will include these and the football ones in my next post as I need daylight to take the pictures! And my SN sparkle pens arrived in the middle of all that so I got sidetracked!

The image is Octavia Thinking designed by Nikky Hall and can be obtained from the Polkadoodles website:  http://www.polkadoodles.co.uk/octavia-thinking-digital-stamp-download/


The flowers are made using Dreamees fairy flower stamps which can be purchased here.  
I heat embossed with white detailed embossing powder and medium onto topsy turvy card from create and craft and curled using the Tonic flower shapers tool set.


It was then distressed with a sandpaper tool and a blade run around the edges of all the papers and I curled the topper to make a more interesting design.


Love my new Tonic Just for you dies from Hixxysoft, I am going to make some simple cards next with just this sentiment and some flowers.  More for the craft stall!  Same as before with the Dreamees stamps to make the flowers and this time I used the Crafters Companion distress embossing folder  http://www.crafterscompanion.co.uk/members-special-offers-c6/new-launches-c2639/crafters-companion-textures-8x8-embossing-folders-distress-embossing-folder-p26560

I only made these today so the ink is fresh!  Just got to finish off a few more of the Scruffy Kitten range then I will post those up!
Happy Crafting!
Kay
x

Monday, 19 October 2015

Dreamees DT Call....


Moving, holidays and life just got in the way the past few months.  But now I finally have a computer desk/colouring station built yesterday I am back!  

I have been colouring a lot of images in any spare moments while all my crafty bits were packed away so I have over 20 images ready to go for cards.  I have made so many cards over the past few months I didn't know where to start!  So decided against cards and gone for my Dreamees DT call images instead!!!

My first set of Dreamees MDF was a general one and it had a baby grow and a bottle so I made these two hangers with a mini scrapbook MDF page which I had in my stash.

I used papers from the CD and some welcome rub ons I have had in my stash for years but hardly used!  The pearls are from Hobbycraft (managed to get a whole reel of them for £2.99!) and the lace is from The Works.


I cut the banners by hand and the star is a christmas Spellbinders die!  The buttons are from my jar full of them and the blue and pink silk ribbons were from QVC years ago when they used to still show crafting! The large pearl on the boy hanger is from ebay. The flowers on the girl hanger were made with the Dreamees stamps with perfect medium and white detail embossing powder.  I just added some single pearls again from Hobbycraft to the centres.

Next was a card, I loved the fairy door set but had not finished the door (I am still looking for the perfect handle!) so made a card using the stamps and papers from the fairy CD.  I had recently purchased a mushroom die on a visit to Crafts U Love in Surrey, they have a whole room of die's, it's my heaven! So I added them with my favorite product ever, Pebeo Guilding wax. The lace ribbon is from The Works again and the hat pins are from ebay.  The swirl die is Hot Off The Press and the stamped image is onto a Spellbinders die.  All layered onto silver Mirri with some blue pearls from my stash.

And lastly my mum wanted something for a bare wall in her new kitchen which is pale green.
I think this matched perfectly, although I did have to keep making flowers as I kept layering them up and running out.  Again I used perfect medium and detail white embossing powder.
She loved it and it's now hanging up!


I did use some Crafters Companion stamps to distress the background again using the detail white embossing powder with the perfect medium.  Then I layered a paper doily, a spellbinders circle die and some tattered lace branches before adding all the flowers on top. More pearls and ribbon from my stash completed it all and then I used Tim Holtz twine in green to string it together.

The best thing about doing this DT call was embossing again.  I loved making all those flowers even if it got annoying that I kept running out!  It was nice to go back to it again after so many years!  I haven't heard anything back yet, but no news is good news!

I will share some of my coloured images once I have made the cards but here is a sneak peak!

This was for my now 6 year old son from my father in law.  Loved the colours as really different from what I usually use.  
Apologies for the poor lighting, this is now sorted now I have a work space at last, and starting to live the crafty dream!

Happy Crafting

Kay
x

Wednesday, 10 June 2015

Love a Cuppa...

I love Craftwork Cards!

 They have a unique look and are easily identified!  

I have made a couple of cards and a cup as a teachers thank you for the end of term.  We are moving in a month and I may not see my craft desk or items for a while so getting ahead of myself!  I will be making a few more cups this week and storing them safely at my mums while we move!

 Both cards are made using CWC bases. the one above I tore the edges and below inked with a pink ink pad. I coloured the cake's with Spectrum Noir pens and pencils.  I have hardly added any other items to these projects and find them really quick to make so for selling these are ideal.


You can get the set I used here 


Off to make more cards for my future craft stall, done birthday and wedding so onto new baby next.
Only a few weeks to go! Eek!

Thanks for stopping

Kay 
x


Sunday, 7 June 2015

"The Hatter"

So my friend asked me to make a special card for him to give to his daughter for her 16th.  All I had was Turquoise/Aqua as a brief.

I think my colouring practice recently is paying off, she thought it was amazing and said she couldn't even tell, she thought it was a printed image!  Her friends may turn out to be some of my new customers!


The spotty background is from the new Dreamees Special Occasions Collection.  Layered on top is something I created a while ago!  I painted white Gesso onto kraft card then painted it with a blue/grey/white mix of acrylic paints.  Once this was dry I embossed with the Crafters Companion Vintage embossing folder and covered it in silver gilding wax after sanding it down and then used my We Are Memory Keepers Heart blade to ruffle the edges.  I then layered the leftover strip of Spotty paper and the lacy doily on top wrapping the white and yellow ribbon round it before I stuck it down.


The Crafters Companion traditional bunting die was cut twice in the two contrasting colours and layered. I added a row of pearls (Hobbycraft) and the yellow ribbons. All the yellow paper is bazzill basics and I used the Tim Holtz Vintage Market die for the letters and a HOTP Viney Swirl die for behind the sentiment. I cut this in half to extend it behind.  The sentiment stamp is unknown as purchased from a seller on facebook and arrived in plain packaging!  It is foam mounted onto a Spellbinders die cut from Stately Circles using the last bit left from the A4 printed out spotty background sheet. Not a scrap left!  The ribbon bows (Hobbycraft) were doubled up and topped with a pearl (ebay).


The 16 was cut again from the Tim Holtz letter die and foam mounted onto some create and craft (C&C) couture dies. The Turquoise paper is also from C&C (bling 12x12).  The yellow flower and leaves are made from Dreamees Fantastic Frills stamp's and coloured with Spectrum Noir pens and then pencils and blended. Topped with a gem from ebay! The other flowers and the card candi in the middle is Craftwork Cards.

"The Hatter"

She was coloured using Crafters Companion Spectrum Noir pens and pencils and then blended. So I am entering this into the Spectrum Noir Bling June 2015 challenge as it has bling paper and a bling stone in the centre of the yellow flower!

I think this is one of my best coloured images and I love the way the card turned out when throwing so much on an 8x8 space!
Just one other gorjuss card to come then will share some of my  new Craft Work Card makes!

Thanks for taking a look

Kay
x