Monday, 30 July 2012

Spellbinder and silhouette....


Finally I got the adapters for my vagabond to use my first spellbinder die!  

Inspired by Sue Wilson and just had to get one of the flower dies to try out!  I found 3 flowers worked best on a 20cm x 20cm card but they looked a little bare so cut out some leaf type shapes and matt's from my silhouette and had a heap of bits ready.
                                                                         Prep!


Sorry about the glare!

I used all the above with Craftwork Cards sentiments and Tim Holtz Vintage Lace Die, Martha Stewart Punch and added some ribbon and lace.  I used glossy accents for the glue as sticks solid straight away!
The papers are all from Bazzil Basics kit from QVC purchased at christmas and some bling was added at the end in the flowers and on their own for more sparkle.  I loved making these and have lots of leaves left over so will do some more spellbinders cutting when I get 10 minutes peace!


The last two designs I am going to make again with my own design of leaf so I can sell them!  I have run out of that lace and the white ribbon so need to go shopping!  They must look realistic, my 2 year old son asked to smell them!!!

I had a very expensive craft weekend without going to any craft shops!  QVC had a sale so purchased a few items there, had to stock up on A4 cards for work cards and purchased some horse stamps from ebay for a craft fair I'm doing in September for Riding For The Disabled.  I am actually quite scared of horse's but one of my oldest friends is a horse nut and there all the time and has made some lovely fridge magnets to sell so we will be sharing a stall.  Can't wait.  Just need to get stock made up ready in time!  
Till next time!
 xxx


Thursday, 12 July 2012

Wedding Bells....


Another one for work....


A colleague married last weekend so for a big enough card from all of us was back to A4!  Didn't want it to be to fussy so decided on black and white.  Used my silhouette to cut the letters and hearts and mounted onto mirri board and black card.  Used plain black card from Hobbycraft and some lovely ridged white card which I had a bit of a fight with the printer with but it was worth it!  The gems are from my wonderful poundland stash!  Then used a Tim Holtz Love and key charm around the white ribbon (also from Hobbycraft) to finish it off.  


Really pleased with the result and by looks of the picture's they had a great day and are now having fun in Mexico!

Just making cards ready for a craft fair and starting on Christmas so lots on the go!  

 Kay xxx

Wednesday, 4 July 2012

Finally... father's day cards!


Thought I had posted these already, goldfish head again! 
I have been making some large cards again, more for work and friends which will be posted once they have received them!


This was made for my dad, Kanban clock paper's used with stampin up bunting punch and a clock embossing folder used on the cardboard (it came in the middle of wrapping paper to protect it!).   Just went over it with white ink. The gold Martha Stewart glitter covered some cheap letters I got from ebay ages ago and never used.  Definite improvement!


This one was for my father in law spent ages on the clock mask but was worth it.  He is an Arsenal supporter so had to add the tinge of red. This is still the card from the inside of the wrapping paper! The sock tag came from a free cd and the button from a bulk buy from hobbycraft.  The dad is made from Vintage Market die by Tim Holtz.  I cut the flags free hand and trying to overcome writing on cards gave it a go!

They both loved their cards and my other half ,well he got given a leftover  (below!) from sales of last year as he does nothing for mother's day I feel I shouldn't use my stash on him!!!  Crystal Palace colours so he was happy!


Got inspired by all the Christmas crafting on tv recently and decided to start making Christmas cards...here is the first of the year!  Sorry the pic is wonky, poor photography!  Have a few more bits ready to make up into cards all ready embossed and glittered.  So will get onto those at the end of this week.


Happy Crafting All!

Kay xxx

Saturday, 2 June 2012

Back on it!

Well May was a busy month so my blog has been a little neglected.  First my mum had a stroke and was in hospital for a few weeks and it was my daughter's 6th birthday. Thankfully my mum is home now and improving each day and my daughter loved her day so a better end to the month than the start!

I made a couple of cards using the same layout, A4 in size which were actually very simple but took an age to make due to waiting for the glue to dry each time you fix an item!

Made for a work colleague...


I also had to make a card for my daughters best friend so used the same idea just made it more colourful!


The small card is a money envelope as she wanted to go on a toys r us shop!  Will try and sell these locally I think as everyone has been raving about them!

Made this today, had a hungover other half, kids who are moody and wanted to play in their room so I was happy at my desk for a few hours playing with a new Tim Holtz mask and trying to get ahead of myself for a change!


The brown paper is from the inside of a roll of gift paper and the tag from a free cd from a magazine.  This cost pennies to make!

And finally my daughter's birthday card!


Going to see some boats on the river Thames tomorrow morning and then baking in the afternoon for a street party on Monday so will have to wait and craft again from Tuesday!

Tuesday, 1 May 2012

DT Call for Funky Hand!

 Showing a few of my favorite creations!  

Card 
A card that I may just put in a frame and not give it away!
I made the topper first playing around with some new Tim Holtz stamps, cut the butterflies using my silhouette onto white paper which I inked and stamped.  Used a Tim Holtz vintage die on some corrigated card and added a coordinating ribbon and button. 

Mini book  
Covered with handmade type paper. Covered and stamped each page and added ribbons and glitter flowers. Stamped and embossed also.

Scrapbooking

My First Two Pages completed approx 2006


A recent page as she is now...
Hope you enjoy looking!

Wednesday, 25 April 2012

Sport on tv all weekend = crafting for me weekend!

Hellooo! 
Well being banished to my craft area was such a great way to spend a weekend.  I made this card with left over things lying about!  I cut the heart out using the silhouette and edged with green ink and added the gemstone.  The scrap of green was embossed and sanded and mounted onto mirri then the lace ribbon stuck on and the white ribbon tied around it.


The green leaf paper was my inspiration for this card. It is from the first TSV I got from QVC around 4-5 years ago!  I decided it was time to use up all the old stuff I have that I don't tend to reach for.  I folded the front of the card in half and covered the part that shows with the green leaf paper and edged with the same green ink pad. Added the topper by laying the card flat (to make sure the top of it stayed within the size of the card!) and stuck on the heart with foam pads.   Stamped the happy birthday in white, tried to emboss it at first but it wasn't readable!  Trial and error but not a very good stamp to be honest and I wish I'd changed it but it all works together so I didn't want to pull it all apart!


Mounted all the layers using foam pads under the mirri layers and added it to the bottom of the card so it would hold up the front and added the card candi with foam pads.  Done!


I was also completing some secret stuff that I can't put on here yet! And I can now share a birthday card I made for a friend at work who kindly requested I made her card!  She loved it :0)  


I used an A4 card,  covered in Tim Holtz paper which I had stamped and heat embossed. The Happy Birthday topper was all cut out with my silhouette and I added the glittered star wire ribbon. 

Saturday, 21 April 2012

More sunshine on a rainy day...


Another sunshine card!  
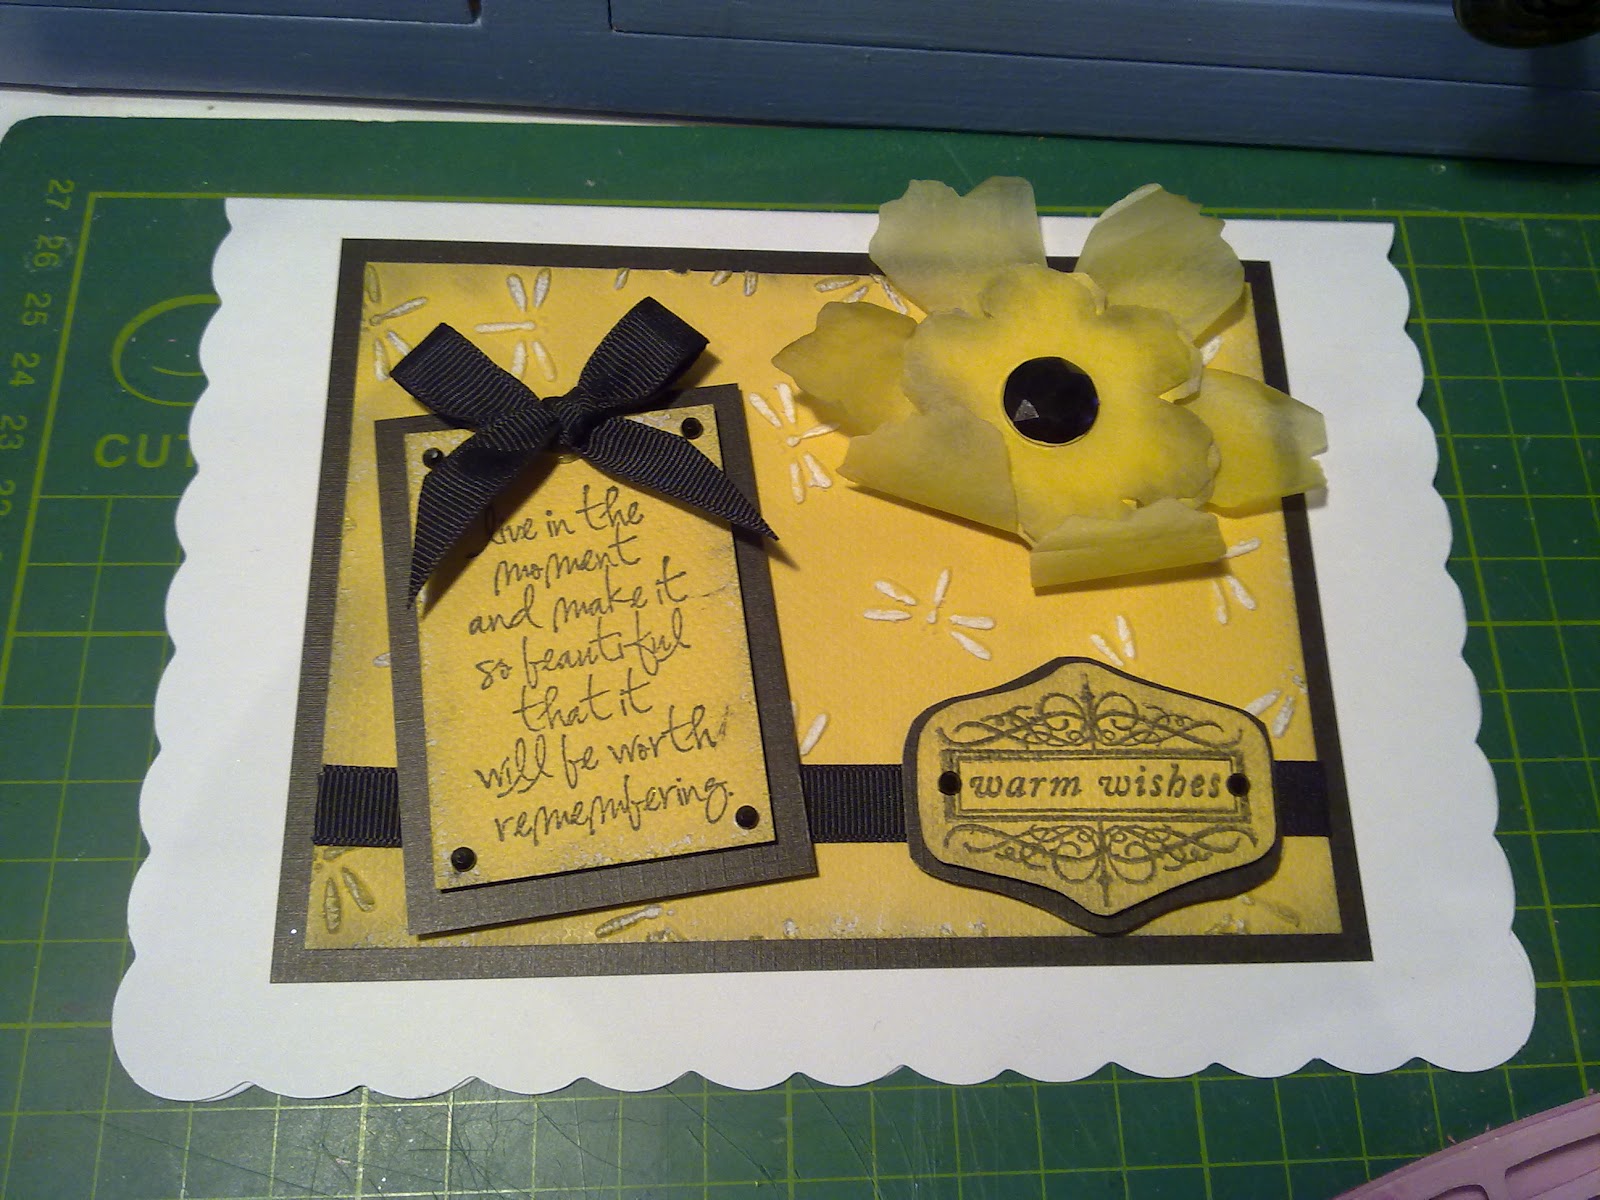
Used the same TH stamp for the sentiment as the previous card, then mounted onto black card and added the black gem stones,  Embossed the dragonfly's again mounted onto black card after sanding and adding black ink to the edges with a sponge.  I used a TH Tattered Floral die for the flower. I cut a large and small rounded flower out of white vellum and the smaller one again in the yellow card.  I inked the white flowers with yellow brilliance ink pad then went around the edges with black on the sponge again. The large gem stone was clear but I coloured it with a black pro marker so it would match!  Stuck it all together with foam pads to give some dimension. The warm wishes sentiment is from an old QVC stamp set and again backed by black card and added a couple of gem stones.  The ribbon is dovecraft and stuck this down with tape and added the bow using silicone glue.  


Now this is what is on my desk at the moment....


                  ...will put up the finished result tomorrow once the silicone glue is dry!!!